How to backup your Microsoft 365 Authenticator credentials

Backup Microsoft Authenticator settings

***Microsoft operates Microsoft Authenticator from its Entra ID service and procudeures in this post have been superceded with effect from September 2025. Instead, click here to read the latest guidelines for Microsoft Authenticator MFA account backup.***

*****

Backup and restore your Microsoft 365 multi-factor authentication (MFA) credentials to restore access to 365 dashboards in the event of a lost or stolen mobile phone.

This option is especially useful for 365 tenancy owners/global administrators. For example, if you are a 365 tenancy owner/Global Administrator (global Admin) then you cannot turn to a higher authority to re-establish credentials if your credentials are lost.

microsoft authenticator

Click on the headers below to find out how to backup Microsoft Authenticator on Apple and Android mobile phones.

Why backup has to be configured

Microsoft Authenticator data is not included in iCloud and Android mobile phone backups because the security keys are critically sensitive. Instead, you can organize Authenticator data backups in Microsoft Authenticator app settings. Authenticator backups can then be saved to Google Drive/iCloud, however you have to be verify identity against a Microsoft account to validate your identity when restoring credentials.

Microsoft Account vs Microsoft 365 account

You need a Microsoft account to backup and restore Microsoft Authenticator credentials. A Microsoft account and a Microsoft 365 account are two different entities. Without a Microsoft account you cannot back up your 365 credentials.

If you have a Microsoft account, but you have fogotten your credentials, you may need to establish a new Microsoft account. Do not lose the credentials to your Microsoft account. If you forget these credentials, you will not be able to connect Microsoft Authenticator on a new mobile phone to restore your settings. This would be catastrophic, so be sure to document your Microsoft Account credentials.

How to backup Microsoft Authenticator

Use the steps below to configure backup in Microsoft Authenticator settings. The process may vary from notes here because Microsoft updates its processes periodically. Also, the process might vary depending on your mobile phone hardware and operating system. Either way, prompts are not difficult to follow. These tips will steer you in the right direction:

  1. Open Microsoft Authenticator on your mobile phone
  2. Access Settings: Tap the three vertical dots at the top right corner and select <Settings>
  3. Enable <Backup>*
  4. Depending on your hardware, provide your Microsoft Account credentials if/when asked**

 * Apple users will need to be sure Authenticator is logged in to iCloud.

** In some cases, users may already be logged in to existing Microsoft Accounts, however the backup process will direct you to provide credentials as necessary. 

Recovery & Summary

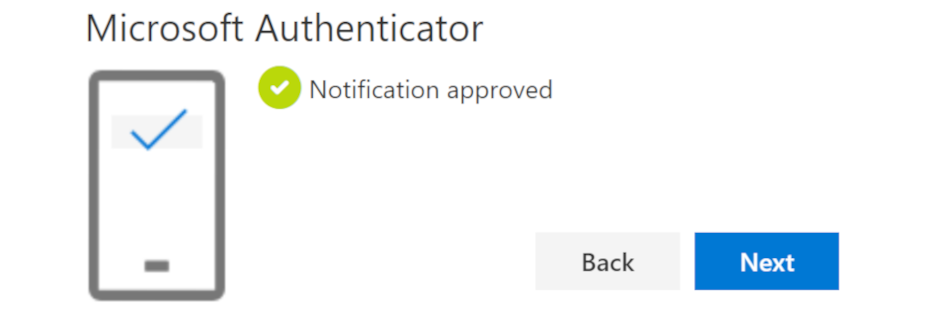
To recover your credentials, install Microsoft Authenticator on your new mobile phone. Usually, the <Welcome> screen offers an option to <Begin Recovery>. This option depends on your hardware and software versions. The process is a little different for Apple and Android users, and is easily executed provided you have the credentials for iCloud/Google account, and your Microsoft Account.

You should periodically check Authenticator backup settings to verify backups are current. Authenticator app settings will confirm when your credentials were last backed up.

Authenticator offers options in settings to override Android or Apple screen-lock defaults. Also, some Apple and Android versions may need Authenticator enabling to run in the background. This can be checked in Authenticator settings.


 Summary

Tenancy owners and global admins do not have scope to resort to a higher authority to restore access to a 365 dashboard if their mobile phone is lost or destroyed. Therefore it is crucial to your organization’s IT continuity to protect your access settings to 365 Admin. Microsoft Authenticator enables you to restore existing credentials which cannot otherwise be found in Android and Apple backups.

For help, contact us using WhatsApp via our web site, or by phone.

About ComStat.uk: Internet Service Provider Comstat provides IT support, web hosting, and media services including web design, Microsoft 365 setup, and audio/video production, serving businesses across Denbighshire, North Wales and Wirral from Ruthin, and Lancashire and the Northwest from Bolton.


Configure DMARC using cPanel

Authenticate outgoing email with DMARC

Configure DMARC (Domain-based Message Authentication, Reporting, and Conformance) to help protect your domain name from being used for email spoofing. Unless you configure DMARC, email that you send can be dropped by a receiver’s email server before reaching that user’s Inbox.

dmarc txt record using cpanel

Click on the headers below to follow our guide to obtain a DMARC record using cPanel WHM and then configure your DMARC record in your domain name’s zone record at your domain registrar. Click on images to see in full resolution.

How to prepare

DMARC is already enabled on your web server. DMARC builds on DKIM and SPF, so before implementing DMARC, be sure to implement DKIM first.

Before you configure DMARC in your domain name’s zone record, you will need to understand where your domain name is managed. If your domain name is held at a domain name supplier using their nameservers, you will need to configure DMARC records in your domain name’s zone record at your supplier. If you own the domain, but we hold it in our management portfolio, then you might only need to make amendments in cPanel which will make things easier.

Therefore, before you start, prepare as follows:

  1. if in doubt, check with us where your records need modifying
  2. find your cPanel login credentials from your server information sheet
  3. (optionally) find the login credentials for your domain name supplier

We recommend you add a DMARC record to your domain name’s zone record which initially operates DMARC in test mode. Our workflow therefore is designed to accomplish this preliminary objective.

Making adjustments to your domain name’s zone record requires exacting language and sytax. A missing character can cause a web site to cease functioning and disable your email. Nor can you test it – changes made have effect in real time. Be sure to copy records before overwriting “last known working” states.

We have decades of experience managing domain names on behalf of clients. If you are nervous about dealing with this technology, we can provide admin support for domain names and ongoing services – ask for help.

Step-by-step instructions

Follow these instructions caefully to configure DMARC and activate the service. Each step is important. Missing characters like colons, semi-colons, and spelling mistakes can cause a lot of work.

1. Log in to cPanel:

  • open your web browser
  • enter your cPanel URL (e.g., https://yourdomain.com:2083)
  • log in with your cPanel credentials

2. Navigate to <Zone Editor>

  • in cPanel dashboard, scroll to <Domains> section
  • find and click open <Zone Editor>

3. Look for a DMARC Record:

  • in Zone Editor, find the domain you want to check
  • click <Manage> next to the domain
  • look for a TXT record with the name: _dmarc.yourdomain.com
  • if you do not see one, you will need to create it

4. Create or Modify a DMARC Record:

  • if you need to create a new DMARC record, click <Add Record>
  • choose <TXT Record> from the <+Add> dropdown list
  • in the <Name> field, enter: _dmarc
  • in the <TTL> field, leave the default value
  • in the <Type> field, select: TXT
  • in the <Record field>, enter your DMARC policy. For now, use:
    • v=DMARC1; p=none; rua=mailto:dmarc-reports@yourdomain.com; ruf=mailto:dmarc-failures@yourdomain.com; sp=none; pct=100
  • for <mailto:> substitute your preferred email address• see notes below
  • select and copy the record field to clipboard or notepad. You will need this later

5. Save the DMARC Record:

  • Click <Save Record> to apply the changes

6. Log in to Your Domain Registrar:

  • in a new browser window, go to your domain registrar’s website
  • log in with your credentials

7. Access DNS Management:

  • find the DNS management or zone file settings
  • this section allows you to add or edit DNS records

8. Add the DMARC Record you created in steps 4 and 5 above:

  • Add a new TXT record
  • in the <Name> field, enter: _dmarc
  • in the <Value> field, paste the DMARC policy you created and copied earlier in cPanel
  • Save the changes

9. Verify the new DMARC record:

  • Use online tools like MXToolbox to verify your DMARC record
  • Check for typos like missing colons or spaces, or inaccurate spelling

Notes:

DMARC is a technology that operates on a few levels. The record we gave an example for you to use above is for a DMARC policy that shows DMARC is enabled, but not reactive (p=0). The record can be modified to p=quarantine and p=reject which cause emails that fail a test to be either quarantined or rejected by a receiver. In some circumstances like emails sent to a mailing list, values for sp and pct can also affect how your outgoing email is received.

By using policy p=0 and establishing the email address of the person you want to receive DMARC reports, you have a minium valid record. Once this tests positive, consider upgrading the policy to p=quarantine.

Summary

DMARC builds upon existing protocols like SPF and DKIM to help domain name owners specify how their organisation’s emails should be treate by receiving email servers that fail authentication checks. This is important because it helps to prevent a malicious party from attempting to use your email addresses to purport to be you using spoofing and phishing attacks. Consequently, you can configure DMARC a few ways.

Making adjustments to your domain name’s zone record requires exacting language and syntax. A missing character can cause a web site to cease functioning and disable your organisation’s email. Nor can you test a modification first – changes made have effect in real time.

Expert help available

We have decades of experience managing domain names on behalf of clients. If you are nervous about dealing with this technology, we can provide admin support for domain names and ongoing services. We can turn modifications in minimal time at reasonable cost while saving you from risk of web site and email disruption – please ask for help if in doubt.

Configure DKIM in cPanel

Verify outgoing email with DKIM

Use DKIM (DomainKeys Identified Mail) to reduce the chance of your users’ outgoing emails ending up in customer/supplier Spam or Junk folders.

DKIM configuration tool

Click on the headers below to follow our guide to configure DKIM using cPanel WHM and post your DKIM records in your domain name’s zone record at your domain registrar. Click on images to see in full resolution.

How to prepare

DKIM is already enabled on your web server. However, the service needs to be implemented. This is because the verification process requires checking a unique DKIM record which only you can add to your domain name’s “phone book” – we call the phone book a zone record. If we have ongoing access to your domain name, we would take care of this as part of the support we provide.

Before starting, you will need to understand where your domain name is managed. If your domain name is held at a domain name supplier using their nameservers, you will need to create DKIM records in the zone record at your supplier. If you own the domain, but we hold it in our management portfolio, then you might only need to make amendments in cPanel which will make things easier.

Therefore, before you proceed, prepare as follows:

  1. if in doubt, check with us where your records need modifying
  2. find your cPanel login credentials from our server information sheet
  3. (optionally) find the login credentials for your domain name supplier

We are able to manage domain names on behalf of clients. Domain name management is a critical function and unwitting errors can cause email and web site failure. If you are nervous about dealing with this technology, we can provide admin support – ask for help. For instance, if you do not have in-house expertise, we can take administrative custody of your domain to manage these kinds of jobs.

Step-by-Step instructions

1. Log in to WHM:

2. Access the DKIM Settings:

  • In the WHM dashboard, search for <Email>.
  • Click on <Email Deliverability>.

dkim configuration module

3. Select the Domain:

  • Choose the domain you want to configure DKIM for.
  • Click <Manage> next to the domain.

4. Enable DKIM:

  • In the DKIM section, click <Install the Suggested Record>.
  • WHM will automatically generate the DKIM record.

5. Copy the DKIM Record:

  • After generating the DKIM record, you will see a TXT record.
  • Copy the entire TXT record, including the v=DKIM1; part.

6. Log in to Your Domain Registrar:

  • Open your domain registrar’s website.
  • Log in with your credentials.

7. Access DNS Management:

  • Find the DNS management or zone file settings.
  • This section allows you to add or edit DNS records.

8. Add the DKIM Record:

  • Add a new TXT record.
  • In the Name field, enter the selector and domain (e.g., default._domainkey.yourdomain.com).
  • In the Value field, paste the DKIM record you copied from WHM.
  • Save the changes.

9. Verify the DKIM Record:

  • Go back to WHM.
  • In the <Email Deliverability> section, click <Manage> next to your domain.
  • Click <Check> to verify the DKIM record.

10. Test Your DKIM Setup:

  • Send a test email to ensure DKIM is working.
  • Use online tools like DKIMValidator to check if your email passes DKIM checks.

Tips for Non-IT Users

  • Take Your Time: Follow each step carefully.
  • Ask for Help: If you get stuck, don’t hesitate to ask your registrar’s support team.
  • Double-Check Entries: Ensure there are no typos in the DKIM record.
Summary

Business users do not have a lot of patience when it comes to email, and not a lot of people check Spam or Junk occasionally if at all. Email that is lost in this way costs business so DKIM, along with SPF (automatically configured for you already, DMARC, and Reverse DNS are necessary utilities for providing resilient email delivery.

Making adjustments to your domain name’s zone record requires exacting language and syntax. A missing character can cause a web site to cease functioning and disable your organisation’s email. Nor can you test a modification first – changes made have effect in real time.

Expert help available

We have decades of experience managing domain names on behalf of clients. If you are nervous about dealing with this technology, we can provide admin support for domain names and ongoing services – we can turn modifications in minimal time at reasonable cost and while saving you from risk of web site and email disruption – please ask for help if in doubt.

Configure Reverse DNS (RDNS)

Reverse DNS

Reverse DNS, also called rDNS, is used by email servers to verify your email has reached it from an email server and IP address that you own. rDNS is crucial for email deliverability and server reputation. For instance, web site contact forms often fail because Reverse DNS is not configured properly and emails are dropped before reaching a web site owner’s Inbox. This is why SPF, rDNS, DKIM, and DMARC are so important in business email.

Reverse DNS

Your web server’s zone record is already configured to a rDNS mapping so you should not need to intervene unless you are operating exceptional circumstances.

Click on the headers below to follow our guide to record a Reverse DNS/PTR record in your domain name’s zone record at your domain registrar. Click on images to see in full resolution.

How to check rDNS is configured

At the moment, your web server already resolves rDNS, and the record posted in cPanel > Email > Email deliverability should already resolve to:

  • Name: 10.183.202.88.in-addr.arpa.
  • Value metal1.namesfirst.net.

Note that the IP address is recorded in the <Name> field. This is usually illegal logic, and that is why this record has to be specially handled by the owner of the IP address block your server relies on: it requires a “reverse” entry which means it has to be handled at “datacenter” level.

rDNS is a not always an easy DNS feature to deal with. Please contact us for advice if you are in doubt about your server configuration.

Summary

Reverse DNS is an important tool that remail servers rely on to verify that email you send is recognized as valid. Without this validation, you may send email that is rejected or dropped before it reaches a recipient’s Inbox.

Making adjustments to your domain name’s zone record requires exacting language and syntax. A missing character can cause a web site to cease functioning and disable your organisation’s email. Nor can you test a modification first – changes made have effect in real time.

Expert help available

We have decades of experience managing domain names on behalf of clients. If you are nervous about dealing with this technology, we can provide admin support for domain names and ongoing services. We can turn modifications in minimal time at reasonable cost while saving you from risk of web site and email disruption – please ask for help if in doubt.