How to Use Outlook Sweep to Declutter Your Outlook Inbox
What Is Outlook Sweep and Why Should You Use It?
If your inbox is overwhelmed with newsletters, promotions, and recurring emails, use Outlook Sweep to help you regain control. Available in both the Outlook desktop app and Outlook Web Access (OWA), Sweep lets you create simple rules to automatically manage emails from specific senders.
Sweep is especially useful for:
- Automatically deleting old messages
- Keeping only the latest email from a sender
- Setting expiration rules for newsletters or updates
Whether you’re using Outlook at work or at home, Sweep can help you stay focused by reducing clutter and keeping your inbox tidy.
Click open the headers below to learn how to Outlook Sweep to manage your email Inbox. Support options are available for professional assistance.
How to Use Sweep in Outlook Desktop and OWA
Using Outlook Sweep is straightforward. Here is how to get started in desktop and web versions of Outlook.
Outlook Sweep is available by default in Outlook toolbar. The button’s position differs according to how you might have customized your toolbar in Outlook desktop and OWA
Outlook Sweep in Desktop App
- Open your inbox and select an email from the sender you want to manage.
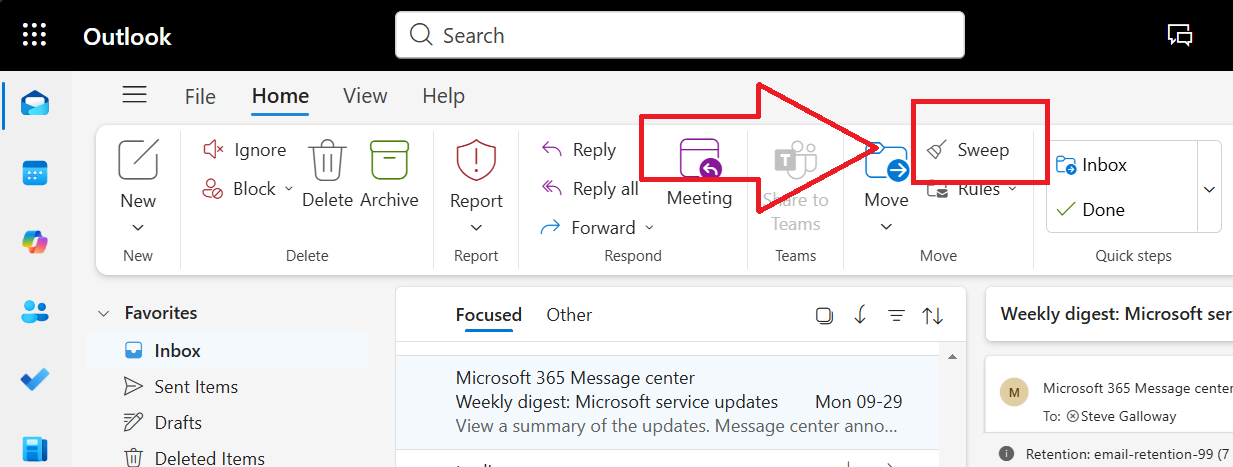
- Click on the Home tab.
- Select Sweep from the toolbar.
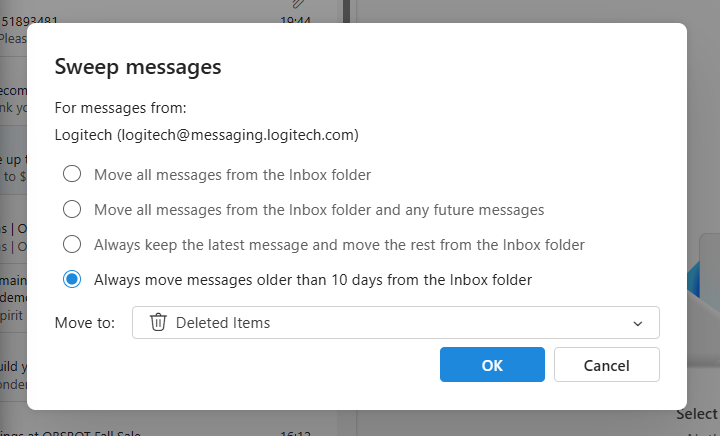
- Choose one of the available options:
- Move all messages from the sender
- Always keep the latest message and delete the rest
- Delete messages older than 10 days
- Move messages to a folder
Outlook Sweep in Outlook Web Access (OWA)
- Log in to Outlook on the web (OWA).
- Select an email from the sender.
- Click the Sweep icon in the toolbar above your inbox.
- Choose your preferred rule and confirm.
These rules apply automatically to future emails from the same sender, saving you time and effort.
Smart Ways to Use Sweep: Real-Life Examples
Outlook Sweep avoids the perceived complexity of Outlook Rules
Sweep does more than deleting emails—it’s about finessing your inbox. Here are a few clever ways to use it:
1. Scan and Auto-Delete Newsletters with Outlook Sweep
Often, we want to scan an incoming email newsletter but we do not need to see it again. You can use Use Outlook Sweep to delete messages older than 10 days. This gives you time to read the newsletter, and then purges the spent content to keep your Inbox clean.
2. Keep Only the Latest Update with Outlook Sweep
Some services send frequent updates—like DMARC delivery notifications, login confirmations, or system alerts. Use Sweep to keep only the latest message from the sender. This way, you always have the most current info without the clutter.
3. Organize by Category
You might want to keep promotional emails but store them separately. Use Outlook Sweep to move messages to a folder like “Promotions” or “Newsletters.” This keeps your main inbox clean while preserving the content.
See this 90 second video for other quick tips for dealing with unwanted emails in your inbox.
Summary
- Combine Sweep with Rules and Focused Inbox for even better control.
- Review your Sweep settings monthly to adjust for new senders or habits.
- Don’t forget to check your folders—Sweep moves emails but doesn’t delete them unless specified.
Outlook Sweep is a simple and powerful way to automate your inbox management. User feedback suggests that it the utility plays an increasing way to surgically prune bloat from inboxes. Espeically as inboxes start reaching storage capacity, Outlook Sweep is a great way to delet email in bulk without having to scroll, select, and delete manually.
About ComStat.uk: Internet Service Provider Comstat provides IT support, web hosting, and media services including website design, Microsoft 365 setup, and audio/video production, serving businesses across Denbighshire, North Wales and Wirral from Ruthin, and Lancashire and the Northwest from Bolton.


