Configure DMARC using cPanel
Authenticate outgoing email with DMARC
Configure DMARC (Domain-based Message Authentication, Reporting, and Conformance) to help protect your domain name from being used for email spoofing. Unless you configure DMARC, email that you send can be dropped by a receiver’s email server before reaching that user’s Inbox.

Click on the headers below to follow our guide to obtain a DMARC record using cPanel WHM and then configure your DMARC record in your domain name’s zone record at your domain registrar. Click on images to see in full resolution.
How to prepare
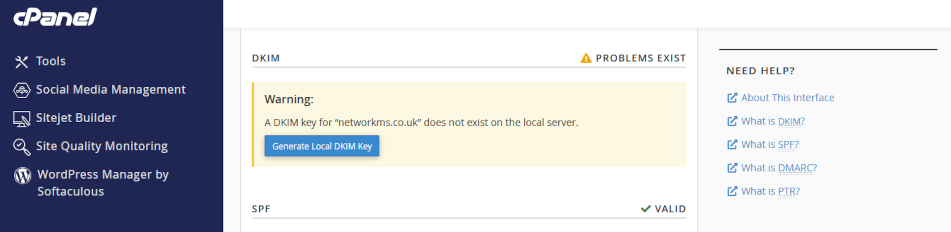
DMARC is already enabled on your web server. DMARC builds on DKIM and SPF, so before implementing DMARC, be sure to implement DKIM first.
Before you configure DMARC in your domain name’s zone record, you will need to understand where your domain name is managed. If your domain name is held at a domain name supplier using their nameservers, you will need to configure DMARC records in your domain name’s zone record at your supplier. If you own the domain, but we hold it in our management portfolio, then you might only need to make amendments in cPanel which will make things easier.
Therefore, before you start, prepare as follows:
- if in doubt, check with us where your records need modifying
- find your cPanel login credentials from your server information sheet
- (optionally) find the login credentials for your domain name supplier
We recommend you add a DMARC record to your domain name’s zone record which initially operates DMARC in test mode. Our workflow therefore is designed to accomplish this preliminary objective.
Making adjustments to your domain name’s zone record requires exacting language and sytax. A missing character can cause a web site to cease functioning and disable your email. Nor can you test it – changes made have effect in real time. Be sure to copy records before overwriting “last known working” states.
We have decades of experience managing domain names on behalf of clients. If you are nervous about dealing with this technology, we can provide admin support for domain names and ongoing services – ask for help.
Step-by-step instructions
Follow these instructions caefully to configure DMARC and activate the service. Each step is important. Missing characters like colons, semi-colons, and spelling mistakes can cause a lot of work.
1. Log in to cPanel:
- open your web browser
- enter your cPanel URL (e.g., https://yourdomain.com:2083)
- log in with your cPanel credentials
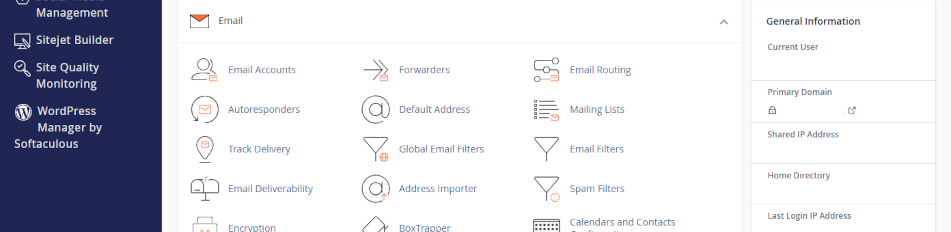
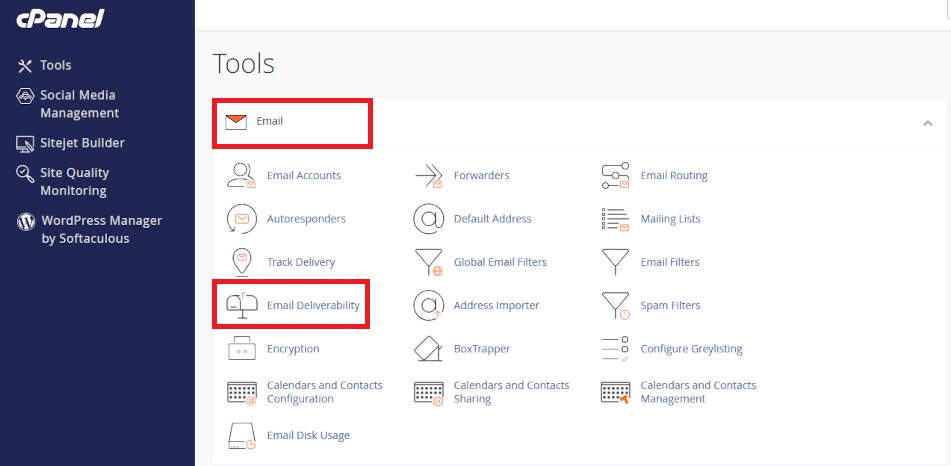
2. Navigate to <Zone Editor>
- in cPanel dashboard, scroll to <Domains> section
- find and click open <Zone Editor>
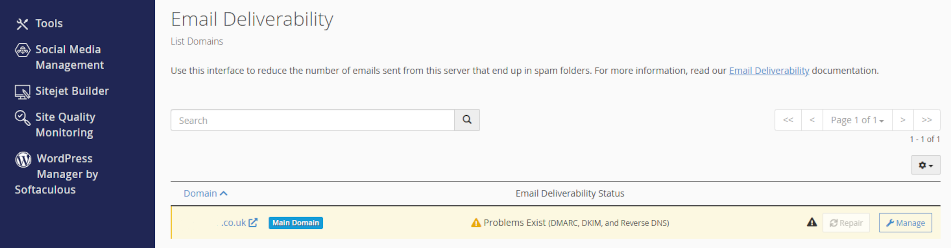
3. Look for a DMARC Record:
- in Zone Editor, find the domain you want to check
- click <Manage> next to the domain
- look for a TXT record with the name: _dmarc.yourdomain.com
- if you do not see one, you will need to create it
4. Create or Modify a DMARC Record:
- if you need to create a new DMARC record, click <Add Record>
- choose <TXT Record> from the <+Add> dropdown list
- in the <Name> field, enter: _dmarc
- in the <TTL> field, leave the default value
- in the <Type> field, select: TXT
- in the <Record field>, enter your DMARC policy. For now, use:
• v=DMARC1; p=none; rua=mailto:dmarc-reports@yourdomain.com; ruf=mailto:dmarc-failures@yourdomain.com; sp=none; pct=100 - for <mailto:> substitute your preferred email address• see notes below
- select and copy the record field to clipboard or notepad. You will need this later
5. Save the DMARC Record:
- Click <Save Record> to apply the changes
6. Log in to Your Domain Registrar:
- in a new browser window, go to your domain registrar’s website
- log in with your credentials
7. Access DNS Management:
- find the DNS management or zone file settings
- this section allows you to add or edit DNS records
8. Add the DMARC Record you created in steps 4 and 5 above:
- Add a new TXT record
- in the <Name> field, enter: _dmarc
- in the <Value> field, paste the DMARC policy you created and copied earlier in cPanel
- Save the changes
9. Verify the new DMARC record:
- Use online tools like MXToolbox to verify your DMARC record
- Check for typos like missing colons or spaces, or inaccurate spelling
Notes:
DMARC is a technology that operates on a few levels. The record we gave an example for you to use above is for a DMARC policy that shows DMARC is enabled, but not reactive (p=0). The record can be modified to p=quarantine and p=reject which cause emails that fail a test to be either quarantined or rejected by a receiver. In some circumstances like emails sent to a mailing list, values for sp and pct can also affect how your outgoing email is received.
By using policy p=0 and establishing the email address of the person you want to receive DMARC reports, you have a minium valid record. Once this tests positive, consider upgrading the policy to p=quarantine.
Summary
DMARC builds upon existing protocols like SPF and DKIM to help domain name owners specify how their organisation’s emails should be treate by receiving email servers that fail authentication checks. This is important because it helps to prevent a malicious party from attempting to use your email addresses to purport to be you using spoofing and phishing attacks. Consequently, you can configure DMARC a few ways.
Making adjustments to your domain name’s zone record requires exacting language and syntax. A missing character can cause a web site to cease functioning and disable your organisation’s email. Nor can you test a modification first – changes made have effect in real time.
Expert help available
We have decades of experience managing domain names on behalf of clients. If you are nervous about dealing with this technology, we can provide admin support for domain names and ongoing services. We can turn modifications in minimal time at reasonable cost while saving you from risk of web site and email disruption – please ask for help if in doubt.