Laptop Battery Health: Practical Power Management Tips to Prolong Your Battery Lifespan
Laptop Battery Health: Tips to Prolong Your Battery's Lifespan
Laptop battery health is taken for granted. However, its original manufacture quality and ongoing useage are significant factors in extending your laptop’s longevity.
Modern laptops use lithium‑ion batteries. They are reliable and even though technology improves, they do wear down over time. The good news is that you can slow that ageing significantly. With the right settings, habits, and software tools, you can keep your laptop battery health strong for years. This guide explains practical steps any user can apply, whether you own a Dell, Lenovo, HP, ASUS, or another brand. If you need help fine‑tuning your setup, please get in touch.
Click open the headers below to learn more about how Windows Pro and Windows Pro are intended to be used. Support options are available for professional assistance. You can return to our Index of Articles by clicking here.
Why Power Management Matters for Laptop Battery Health
Lithium‑ion batteries age fastest when held at a very high charge or exposed to unnecessary heat. Manufacturers like Dell openly recommend limiting maximum charge to around 80% to reduce wear, noting that custom settings such as <Start Charging> at about 60% charge and <Stop Charging> at about 80–90% help preserve long‑term capacity. Especially with low cost hardware where componentry is necessarily inexpensive, it makes sense to ease stress on this kind of battery.
General battery‑care discussions from wider user communities also support keeping charge levels between 40% and 80% for optimal laptop battery health.
Keeping your laptop plugged in at 100% all day may feel convenient, but it increases chemical stress inside the battery. Likewise, letting it regularly drain to near zero also accelerates degradation. Managing these extremes will improve laptop battery health.
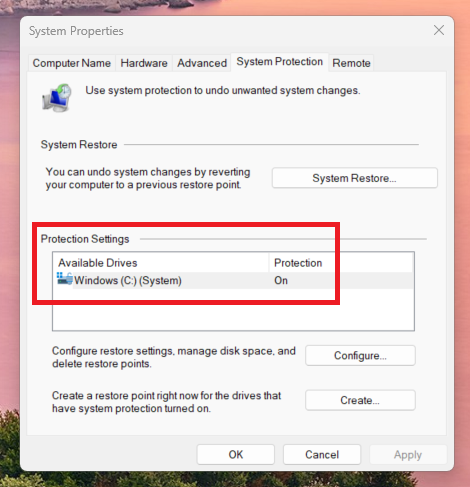
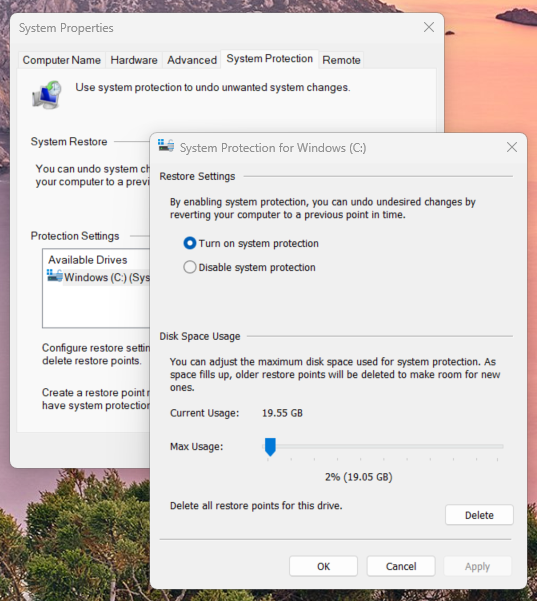
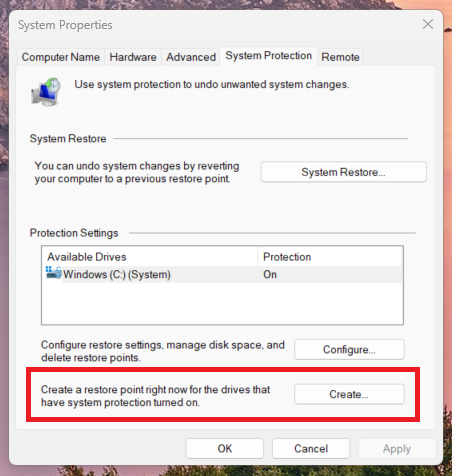
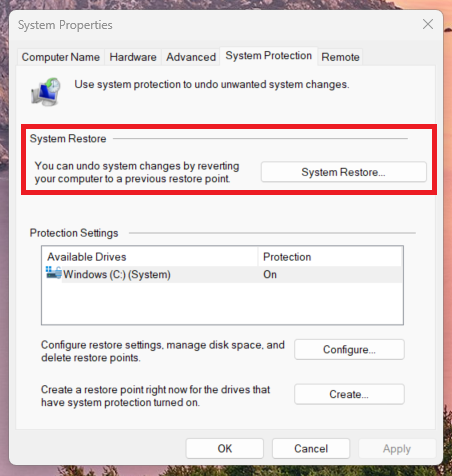
Use Charge Limits to Improve Laptop Battery Health
Major manufacturers feature built‑in tools that let you control when charging starts and stops. This is not necessarily a laptop issue. For instance, current iterations of Android and iOS provide battery power management tools.
Cautionary warning
Even among large manufacturers which use better quality components, low price points mean laptop batteries can often be prone to premature failure. This is not a universal eventuality. However, premium hardware is more durable and less prone to failure. So, especially where lower cost hardware is concerned, using a strategy that reduces strain on a lithium-ion battery is desirable.
Leading manufacturers have different approaches. Some provide software, and usually BIOS will include power management features, which is probably the better way to handle power management.
ASUS
- ASUS Armoury Crate or MyASUS offers “Battery Health Charging” modes such as Maximum Lifespan Mode, keeping charge around 60% or 80%.
Dell
- Dell Power Manager or BIOS settings allow users to set custom ranges such as Start at 60% / Stop at 80%, aligning with Dell’s guidance to reduce “high‑state‑of‑charge dwell.”
HP
- Some HP Business models include BIOS‑level “Maximize Battery Life” settings that prevent charging to 100%.
Lenovo ThinkPad / IdeaPad
- Lenovo Vantage typically includes a “Battery Conservation Mode,” often limiting charging to around 55–60%.
Laptop Battery failure symptoms
Battery failure is usually a gradually developing situation and it is not always obvious that a battery is compromised. There are three main symptoms to look out for:
- your battery life starts degrading, requiring increasing mains power input to maintain charge
- the maximum battery charge capacity diminishes as cells fail
- the battery swells, often causing warping of the laptop chassis
The last symptom is the most serious. By this point, the battery is already compromised and poses catastrophic risk to the laptop as motherboard and circuits are stressed. Beyond damage to the device, this kind of battery damage poses a fire risk.
These symptoms are equally relevant to mobile phones and tablets.
Everyday Habits That Support Laptop Battery Health
Improving laptop battery health goes beyond charge limits. Higher-end laptops, and even more recent Android iterations provide AI monitoring to gauge charging strategies. Common sense is a cheap fix, too. These small habits make a long-term difference:
- Avoid constant 100% charging. High charge levels accelerate wear.
- Avoid deep discharges. Letting the battery reach 0% shortens lifespan.
- Keep your laptop cool. Heat is one of the biggest contributors to cell damage. Using your device in a well‑ventilated area helps maintain battery longevity.
- Store your laptop at around 50% charge if not used for several days. This aligns with Dell’s own storage guidance.
- Avoid cheap chargers. Under‑powered power bricks can cause inconsistent charging and more heat, reducing battery health.
These straightforward changes can noticeably slow wear and prolong functional lifespan.
Summary
Not all systems expose the same settings, and some users may need organisation‑wide configuration, BIOS adjustments, or compatibility checks. If you want the best configuration for your device—or your fleet—comstat.uk can help you:
- Select ideal charge‑limit ranges.
- Configure BIOS‑based battery settings.
- Recommend manufacturer‑approved power tools.
- Diagnose battery‑health concerns.
- Apply policies across multiple business devices.
Proper configuration ensures your laptop battery health remains as strong as possible over the full lifecycle of your device.
If you would like help checking your a laptop battery health settings, feel free to get in touch, or use out contact page to organize an appointment which suits your timetable. You can return to our Index of Articles by clicking here