Create a new email address with cPanel
Set up a new email account
Set up email accounts using cPanel’s email module. You can create new email accounts and manage multiple users with cPanel’s extensive utililties.
See our other articles about email to plan email storage quotas, ongoing management, and security implementation like SPF, rDNS, DKIM, and DMARC. For advice, we can help you design policies and procedures.
Click on the headers below to learn how to create an email account. Click on images to view at full resolution.
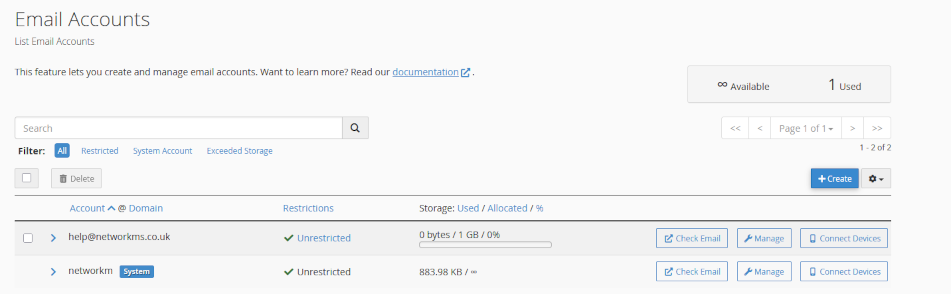
Create a new email account
Log into your cPanel web server home page
- open your web browser
- navigate to the URL in your web server info sheet
- enter your credentials and click <Enter>
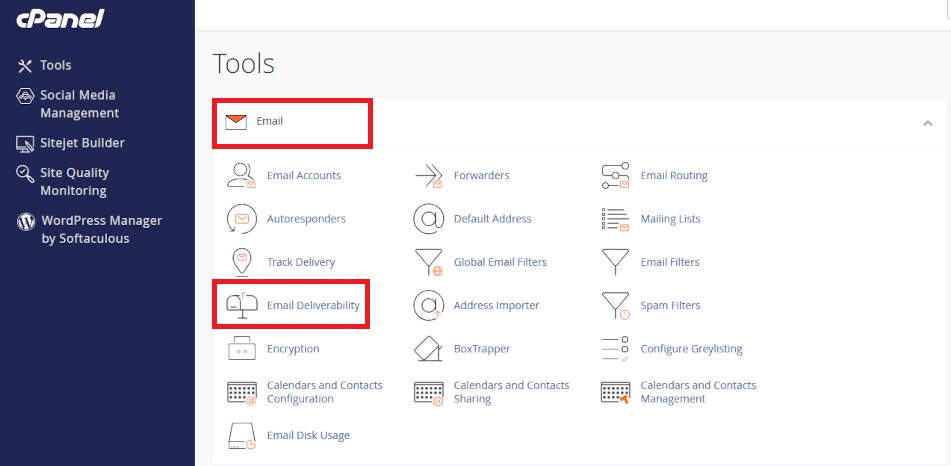
Navigate to cPanel’s Email module
- look for the <Email> section on the cPanel home page
- click on <Email Accounts>
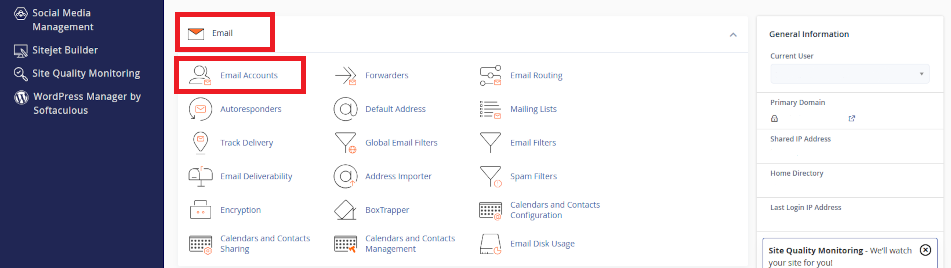
cPanel’s email module features tools for implementing your email policies.
Create your new email account
- In your Email Account menu, click <Create> to add a new account
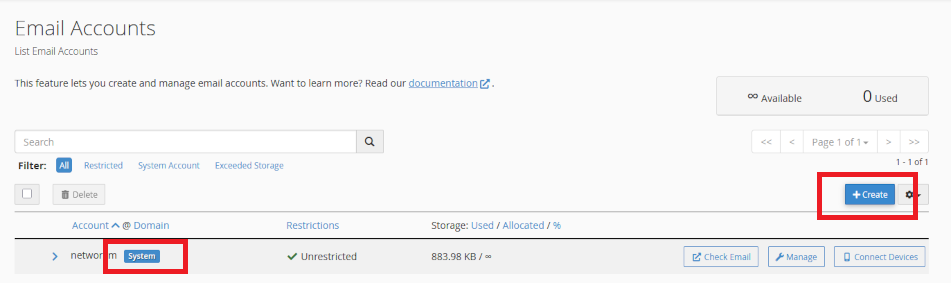
Important Note: when your server is built, it is programmed with a system account. This is for admin use and should not be used for daily email activity. For instance, your System email account is necessary for establishing a centralised address book, shared calendar, and system functions.
Fill in the following fields:
- Username: Enter the part of the email address before the @ symbol (e.g. info for info@your-domain.com)
- Domain: Select the domain for the email address if you have multiple domains
- Password: Enter a strong password or use the “Generate” button to create one
- Storage Space: Set the mailbox quota (default is 1GB)
- Click <Create> to set up the email account
Using a new email account
cPanel provides a fully featured Webmail utility called Horde. Access Horde Webmail by pointing their web browsers to the URL detailed in your web server info sheet. Click here to find out more about Horde Webmail/calender.
Your web server provides utilities to auto-configure devices to user’s email accounts. Users should configure email using IMAP to permit multi-device access.

Your web server provides email auto-configuration files for popular email clients. Users can download the files to execute from their Webmail preference pages.
Summary
cPanel provides a complete suite of tools to create email accounts and a webmail service for users to manage their email with.Also, the system email account can be used to create a centralised contact list which is an important GDPR consideration. The system account can create shared calendars too.
Email does not look after itself and ever changing threats require ongoing attention to protect you from email storage overruns and risks like blacklisting which could prevent you and your users sending email.
Read this article for more guidance on email management
For expert help about email policies and fully supported management, please contact us for help.
About ComStat.uk: Internet Service Provider Comstat provides IT support, web hosting, and media services including web design, Microsoft 365 setup, and audio/video production, serving businesses across Denbighshire, North Wales and Wirral from Ruthin, and Lancashire and the Northwest from Bolton.