Microsoft Outlook Categories
Microsoft Outlook's "Categories" Feature
Use Microsoft 365 Categories to organize and manage your Outlook email, calendar, contacts, and tasks.
Tag your Outlook content with Categories to visually distinguish projects and priorities with colour-coded tags to visually differentiate content at-a-glance.
Find things fast with Categories
Categories help you visually target important content in your ever-growing email folders, calendars, and more. Also, you can search across Outlook for emails, events, and tasks that are tagged with the same category. Used in a well planned scheme, you can use categories to filter an Inbox to create virtual folders on demand. This avoids duplicated content in unwieldy folder structures which leads to broken email threads and lost attachments.
Click on the headers below to find out how to create and customize your categories. Click or tap on images to see in full screen.
What are categories for?
Outlook Categories help you organize and manage email, contacts, calendar events, and tasks. For instance, instead of moving or copying emails to folders, you can keep emails in your Inbox and tag emails with categories. This way, you can filter your Inbox on demand to show one or more categories.
Categories reduce confusion
In situations where an email is saved in two folders which might lead to multiple email threads for the same message, it is more efficient to keep the original email in your Inbox and assign two categories to that email.
Using tags you can:
- create category names and colours
- tag and group related emails
- organize your calendar events by type, such as meetings, personal appointments, or deadlines
- group your contacts as family, friends, colleagues, or clients
- organize your tasks by project, priority, or status
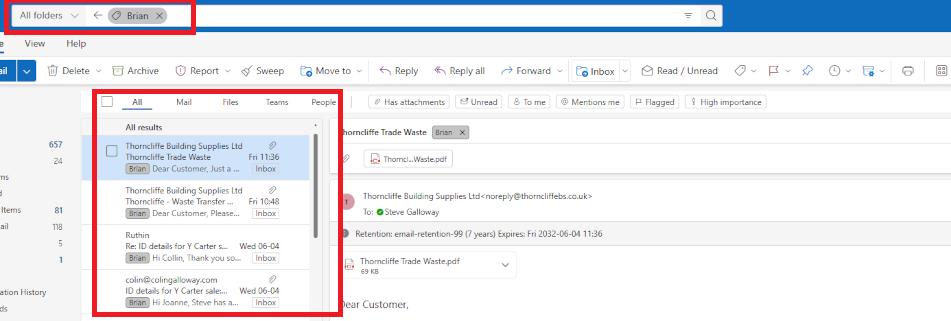
Enter the name of a category you want to filter in “search” and turn your Inbox into a dynamically generated folder which lists activty associated with the tag. e.g all items tagged with “Brian” in this screenshot.
Categories are usually used at an individual level. However A shared email account would rely on categories established for that account. Uniform categories can be established at an organizational level. This requires adminstrator-level knowledge.
How to create and manage tags
Use this workflow to start creating and customizing your tags:
- create a new email in Outlook
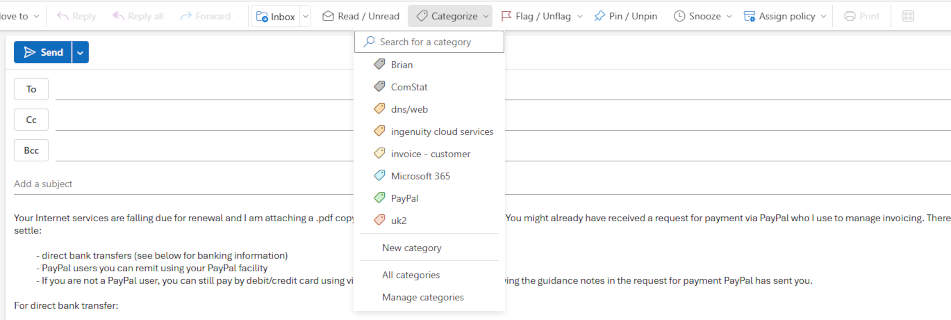
- click open the <Categories> dropdown list.
Outlook always lists a few categories. These are intended as a starting point. In the illustration below notice that there are user-defined categories instead of the defaults. This means Outlook’s original categories have been customized, and new categories added to the user’s library. Notice towards towards the bottom of the list the options for creating, edit, and showing categories. Click on <New category> to create a new category.
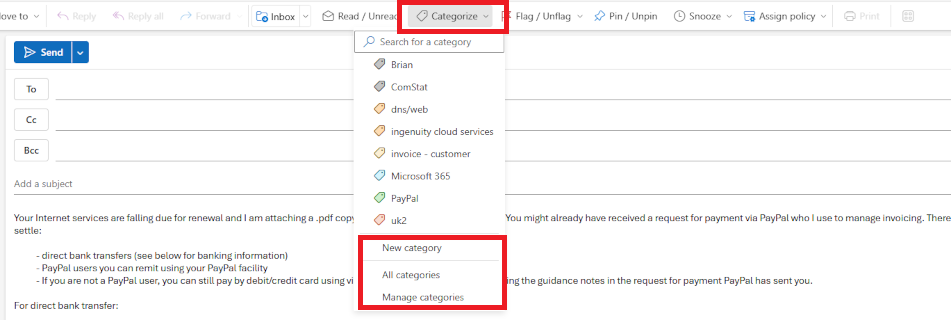
Use <all categories> to view categories. You can use the <search> field at the top of the dropdown box to pinpoint categories. Once you create a category, the same tag can be used in Email, Calendar, Contacts, and Tasks.
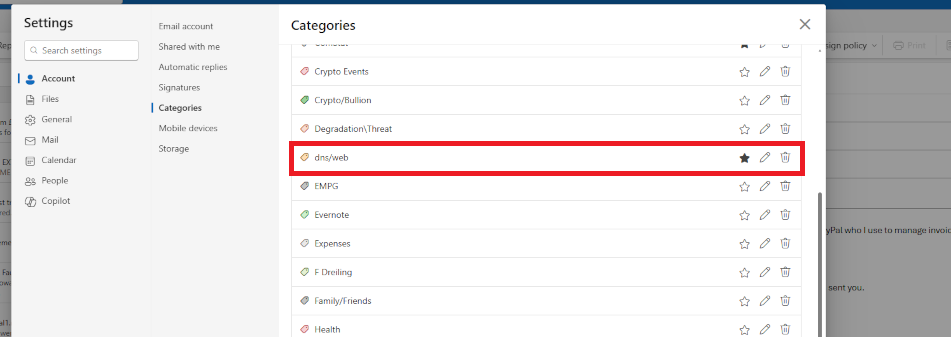
Editing and managing categories
You can edit existing tags to change names and colours. In any email composition and calendar event windows, pull down the <categories> dropdown menu and click open <Manage categories>. Her you can “fave” categories, and you can click on the pencil icon to edit category properties. In the image below, clicking on the pencil in the DNS/web row would open the properties for that category.
Planning Categories
Exit strategies matter. Plan a structure for your categories to avoid duplication and confusion. Unchecked, category libraries can become so large that users forget what categories they already have.
For instance, if you are tagging customers, it might makes sense to have a category for “customer”, but also a drill-down or sub-heading category called “customer”-“customer surname-initials”. For example, a <heading>-<sub-heading> category might look like:
- customer-smith-a
This way “customer” is a global header, and the other fields are sub heading. Organising a strategy for categories helps you manage your list as it grows. This can be likened to departments, which is a common feature in charts of accounts.
Summary
Outlook Categories add a flexible and visual way to keep your Outlook items organized, making it easier to manage and search your communications and schedules as your database grows.
Categories are intended for individual use, but organizations might opt to have individual users follow a common colour-coding theme and defined list defined by a manager to adopt in their own instance of Outlook. Categories can be established at organizational level. This requires administrator level implementation.
About ComStat.uk: Internet Service Provider Comstat provides IT support, web hosting, and media services including web design, Microsoft 365 setup, and audio/video production, serving businesses across Denbighshire, North Wales and Wirral from Ruthin, and Lancashire and the Northwest from Bolton.