How to manage a web site contact form
Contact forms - understand your risk
Website contact forms are a convenient way for visitors to get in touch with you. However, they introduce potentially catastrophic risks that you should be aware of.
Validating form fields helps reduce risk of malicious injection which could hijack or destroy your web site.
Browse this article to explore inherent contact form risks and how to manage them, especially if you are a “self-serve customer. If you do not rely on our optional support, there may be charges for support requests.
Click on the headers below to find out how to find out more about contact form issues. Click on images to view at full-sized resolution.
Malicious infiltration, abuse, and DNS
Web site forms are problematic. It should be easy to display a form that asks for a name, email address, phone number, and message. It is easy to make the form look attractive. However each field in a contact form is an open invitation for a hacker to destroy your web site or orchestrate a bulk email of thousands of emails that you end up bearing the cost of. Without concerted attention, it is a matter of time before a hacker finds a vulnerable contact form.
Contact form problems fall into two areas:
Malicious infiltration and abuse
Contact forms are a significant target for malicious activity. Hackers look for vulnerable contact forms to inject harmful code into your website. Statistically, small businesses are the most frequently exploited victims. Malicious infiltration causes catastrophic trouble like data breaches or site crashes. Common attacks include SQL injection (aka vector attack) or cross-site scripting (XSS). Additionally, spammers might flood your form with junk messages, making it hard to find genuine inquiries.
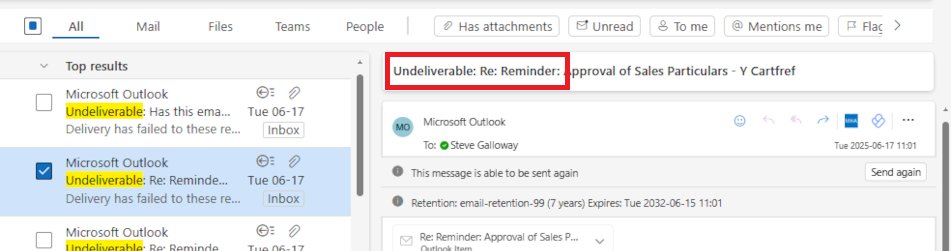
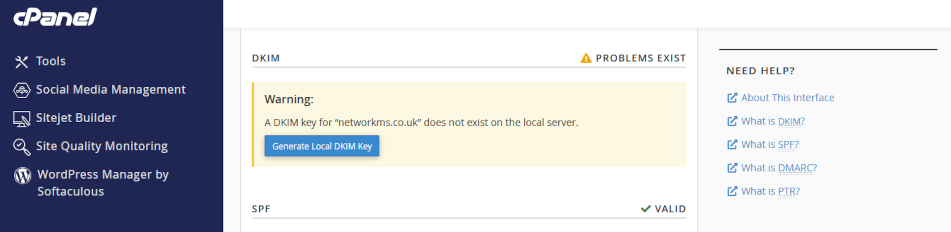
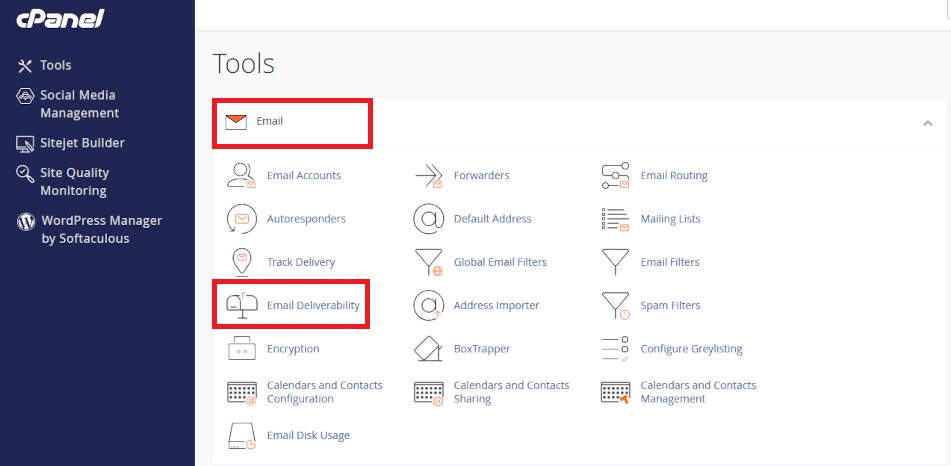
DNS Issues and Email Validation
When someone submits a contact form message at your web site, the information is often sent to an external email address. If there are issues with your Domain Name System (DNS) settings, these emails will probably be dropped without notice to anyone. Since contact form abuse is such a significant target for abuse, email gateway servers are especially sensitive to improperly validated email headers. This means your email server has to be correctly configured with your web site’s IP address using SPF, rDNS, DKIM, and DMARC.
Usually, resolving your DNS for contact form validation needs expert attention and may be beyond the scope of a web designer or in-house expertise. This does not mean web designers do not know their job. Intead, DNS is its own skillset, requires specialised knowledge,and also needs to take account of broader IT processes in your organization.
How to secure your contact form
Here are the three most important things you can do to secure your contact form:
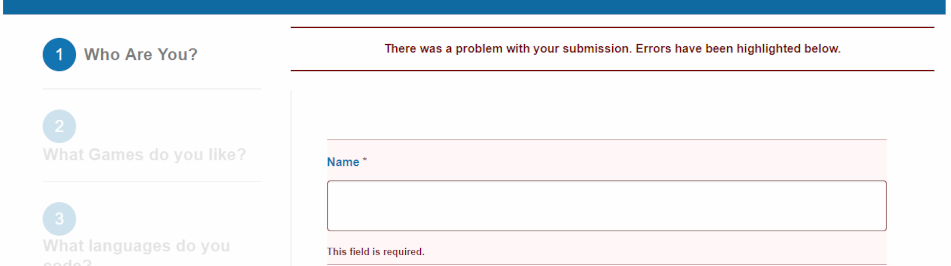
Validate form fields
If you do not restrict the size and content of a form field, anyone can inject source code (an executable program), click <send> and your web server will execute the code which could mean web site destruction or hijacking your identity. Either eventuality is catastrophic and it is easier to do than reading this article.
Therefore, validate fields to limit the length of text. For instance,
- <name> fields could be restricted to 20-30 characters
- numerical composition of a phone number might have to comply with a special formatting, like aaaaa bbb ccc
- email addresses might need to contain “@”, include a valid domain extension like “.co.uk”, and be limited to 40-50 characters
- “message” field could be restricted to 150, 250, 350 characters
This is all “client-side” operation. All of these seriously curtail options for hackers.
DNS
DNS is especially problematic. For instance, your email might be handled by your domain name registrar, or Microsoft 365, and your contact form has nothing to do with your organisation’s usual email server.
Usually, your domain name needs to be customised to include the location and characterisitcs of your contact form. This is “server-side”, and actually not even that because often these modifications might need scripting at a domain name registrar. This is what is called DNS, and it is one of the most difficult technologies to handle – even most web designers rely on upstream support for help with DNS.
Regular testing
Test your contact forms regularly. Keeping spam out of email Inboxes is a moving battlefield. The web server itself is not the problem – when instructed, it acts, and in some ways that is part of the problem – it does not know how to discriminate between good and bad content without form validation.
Hackers are creative, and organizations like Google, Microsoft, and Yahoo spend billions to keep up with evolving threats. In so doing, new security may render the source code you rely on for your contact form irrelevant, and the contact form programmer might not even know their source code is now outdated. Large organisation pay full time salaries just for someone to manage a contact form – daily. Moving to text-based chat bots is not designed to annoy customers – it is an attempt to avoid contact forms in the first place.
Summary and alternatives
Contact forms require constant owner-maintenance and are subject to ever-changing security threats. Also, because your form is programmed on “client-side” (e.g. in WordPress), owners assume responsibility for secure operation of their contact form.
Even if you undertake the overheads of managing your contact form, your contact form should only be one way for customers to contact you. For example, alternate channels like those below move direct risk away from your web server:
- Social media contact options like WhatsApp for Business, Facebook, Insta, etc.
- Microsoft 365 Forms or Google Forms, which can be embedded on your web site
Professional DNS annual support available
If you purchased your domain before you began using our servers and you want us to manage your domain for you, we can administer your domain name records (DNS) annually for £75, including periodic updates as they are required. Use the PayPal QR code on our home page for payment, or contact us to arrange invoicing for our DNS service. This is included in optional support arrangements that you may already subscribe to.
About ComStat.uk: Internet Service Provider Comstat provides IT support, web hosting, and media services including web design, Microsoft 365 setup, and audio/video production, serving businesses across Denbighshire, North Wales and Wirral from Ruthin, and Lancashire and the Northwest from Bolton.